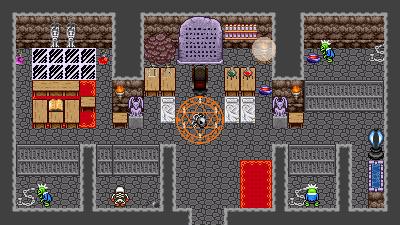

This area is pretty huge, and you will have to deal with a lot of ambushes, so make sure you're well prepared before going in here.
Location A: You will be ambushed by a Novice Priest
and an Ogrus Maximus here, but you'll get an Oak Staff for your trouble.
Location B: This crate holds 1210 gp.
Location C: 3 Ogrus Maximus' will ambush you here, leaving you with 2
Iron Shields when they're dead.
Location D: This crate holds 1600 gp.
Location E: This treasure chest holds a Wolf Helmet.
Location F: This treasure chest holds an MP Revival.
Location G: This treasure chest holds 2 Phoenix Feathers.
Location H: As you walk past this plaque, you'll see a small
discussion with Luciana where she translates some of it, which warns of some
evil event to happen within the next two years.....
Location I: 2 Demoniac Dogs and a High Priest are hiding in this
"closet".
Location J: This crate holds an Ellipse Shield
Location K: As soon as you enter this room, you are ambushed by a
Novice Priest, a High Priest, and a Dark Order Priest. A Dark Priest Rod
is your reward for defeating them.
Location L: These barrels collectively hold 14 Express Foods, 5
Sandwiches, and 36 Breads.
Location M: 3 Ogrus Maximus' try to defend the Dark Library from you,
and leave behind one Iron Shield.
Location N: In this bookshelf you find the "Lord of the
Chasm" book, which can teach someone in your party the spell Dark Wave.
Location O: Here is one of Yveen's save points for your convenience.
Location P: As you enter this room you're once again ambushed by 3
Ogrus Maximus'.
Location Q: This crate holds 542 gp.
Location R: In this bookshelf you will find the book "Pheonix's 8
Tales", which can teach one member of your party the spell Phoenix Shine.
Location S: Going through this doorway, you will be ambushed by 2
Demoniac Dogs and an Evil Sorceror. These guys are pretty tough, but once
you beat them you will find yourself in the Dark Order's secret lab. DO
NOT go in here if you haven't gotten everything in the hidden temple, because if
you do, Luciana will burn everything with Flare spells, and you won't be able to
get back into the hidden temple for the rest of the game.

Location T: You will be ambushed by 2 Dark Order Priests and a High
Priest here, but I wouldn't even bother going through here because unless I'm
mistaken the only thing waiting for you in the basement is certain death.
Location U: These stairs lead down to the Temple Basement, where the
only thing I could find were a lot of creatures who attack you in droves and
consequently slaughter you. If anyone found anything of importance in this
basement, please tell me.

Location V: This treasure chest holds a Dark Priest Rod.
Location W: This crate holds an Egress Certificate.
Location X: Defeating the ambush of a Dark Order Priest, a High
Priest, and a Novice Priest in this "closet" wil get you 1500 gp and a
Black Order Ring.
Remember, you can leave and come back to this hidden temple as many times as you want, as long as you NEVER enter the secret lab.